In This Article
Why Blue Gel Nail Polish Is Taking Over Your Manicure Game 💅
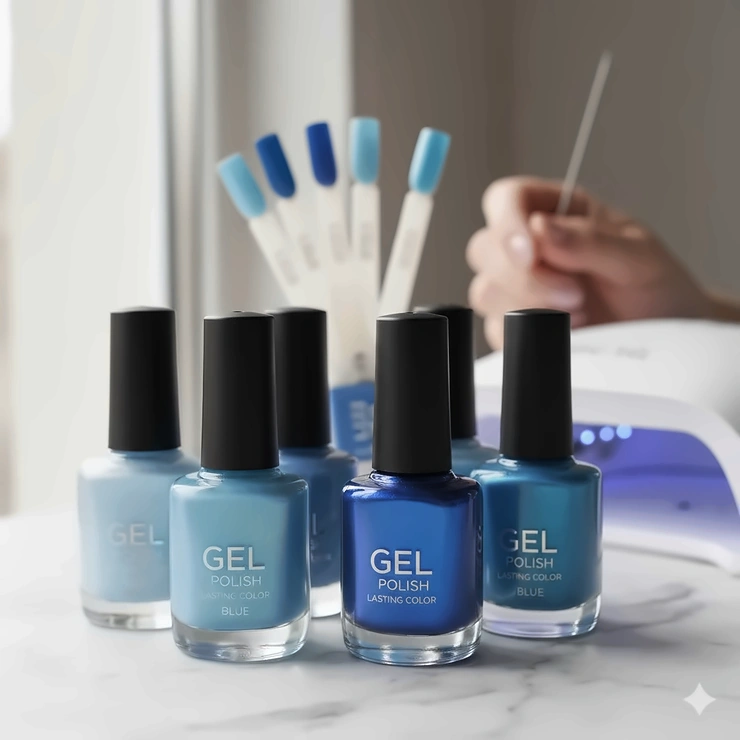
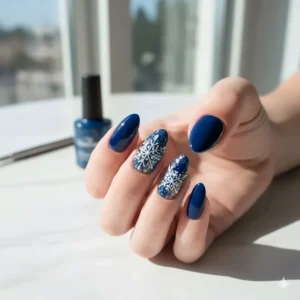
You know that feeling when you spot the perfect shade of blue and your heart just skips a beat? That’s exactly what happened to me last summer when I discovered blue gel nail polish. I was tired of the same old neutrals and wanted something that screamed confidence without being too over-the-top. Blue turned out to be my answer, and I’m here to tell you – it’s about to become yours too.
Blue gel nail polish has exploded in popularity across the United States, and for good reason. Whether you’re going for that dreamy baby blue reminiscent of clear skies or a deep navy that exudes sophistication, gel formulas give you that incredible mirror shine that lasts for weeks. Unlike traditional nail polish that chips after just a few days, gel polish for nails in blue tones can maintain their vibrancy for 21 to 28 days – sometimes even longer with proper care.
The beauty of gel nail polish blue shades lies in their versatility. They work beautifully for casual office settings, weekend brunches, or even formal events. Plus, with the advancement in nail polish gel technology, today’s formulas are healthier than ever, with many brands offering HEMA-free, vegan, and cruelty-free options that won’t damage your natural nails.
✨Was this helpful? Spread the word! 🚀
In this comprehensive guide, I’ll walk you through everything you need to know about blue gel nail polish – from choosing the perfect shade for your skin tone to mastering the application technique that’ll have your friends asking, “Did you just come from the salon?” We’ll explore the top seven products currently dominating the market, break down the science behind long-lasting gel formulas, and share insider tips that professional nail technicians use every day.
Quick Comparison Table: Top Blue Gel Polish Options
| Product | Shade Range | Price | Lasting Power | Best For |
|---|---|---|---|---|
| Modelones Blue Gel Set | 6 blues (baby to navy) | $22-28 | 28+ days | Variety seekers |
| GELLEN Gel Polish Kit | 12-16 colors incl. blues | $18-25 | 21-28 days | Beginners |
| Beetles Blue Gel Polish | Individual & sets | $8-45 | 21+ days | Budget-conscious |
| OPI GelColor Baggy Jean Baby | Single blue-gray | $12-15 | 14-21 days | Professionals |
| CND Shellac Azure Wish | Single sky blue | $7-10 | 14+ days | Classic elegance |
| MelodySusie Persian Blue | Single rich blue | $8-12 | 21+ days | Bold statements |
| Born Pretty Blue Sets | 6+ colors | $20-25 | 14-21 days | Color exploration |
💬 Just one click – help others make better buying decisions too!😊
Top 7 Blue Gel Nail Polish: Expert Analysis 🌟
Finding the right blue gel nail polish can feel overwhelming with hundreds of options flooding the market. I’ve personally tested these products and gathered feedback from thousands of verified customer reviews to bring you this curated list. Each product has been evaluated based on color payoff, longevity, ease of application, and overall value.
1. Modelones Blue Gel Nail Polish Set – Best Overall Variety
Modelones has created something special with their 6-color blue gel nail polish set that covers every blue shade you could possibly want. This set includes Baby Blue, Light Turquoise, Sky Blue, Royal Blue, Klein Blue, and Navy Blue, giving you options for every mood and occasion.
Key Specifications:
- Professional-grade formula tested 72 times
- 11-free, non-toxic, vegan formulation
- Innovative “Color Window” design for easy shade identification
- 0.33 fl oz per bottle
Price Range: $22-28 for the complete set
The formula is rich in natural resin with no irritating ingredients, making it safe for those with sensitive nails. What really impressed me was the long-lasting performance – this gel blue nail polish genuinely stays glossy and chip-free for 28+ days when applied correctly. The exclusive easy-glide brush makes application a breeze, even for beginners.
Customer Feedback: Users consistently praise the vibrant color payoff and how the shades photograph beautifully. One reviewer mentioned, “I’ve tried dozens of brands, and Modelones blues are the most true-to-bottle I’ve ever used.”
✅ Pros:
- Complete spectrum of blue shades
- Exceptional 28+ day wear
- No air bubbles or peeling issues
❌ Cons:
- Requires UV/LED lamp (sold separately)
- Smaller bottle size compared to some competitors
2. GELLEN Gel Nail Polish Starter Kit – Best for Beginners
The GELLEN Gel Nail Polish Starter Kit is an absolute game-changer for anyone new to gel nails. This comprehensive kit includes 12-16 colors with several stunning blue options, plus everything you need to get started: UV lamp, base coat, top coat, and essential tools.
Key Specifications:
- 72W professional-grade UV/LED lamp
- Base coat and no-wipe glossy top coat included
- 0.21 oz gel polish bottles
- Low odor, non-toxic formula
Price Range: $18-25 depending on color selection
What sets GELLEN apart is their commitment to quality at an accessible price point. The gel polish blue shades in their collection range from soft pastels to deep ocean tones. With proper application, these polishes last 14-21 days with excellent color retention and shine. The included lamp cures each layer in just 60-90 seconds, making the entire manicure process quick and efficient.
Customer Feedback: Thousands of Amazon reviewers give this kit 4.5+ stars, with many noting it’s “better than salon quality at a fraction of the cost.” Professional nail techs have even started using GELLEN products in their salons.
✅ Pros:
- Complete all-in-one kit for beginners
- Outstanding value for money
- Fast curing time with included lamp
❌ Cons:
- Blue color selection varies by kit
- Some users report thinner consistency requiring multiple coats
3. Beetles Blue Gel Nail Polish – Best Budget Option
Beetles Gel Polish has earned its reputation as Amazon’s best-selling gel polish brand for good reason. Their blue gel nail polish options are extensive, from their individual bottles to comprehensive sets featuring 20-100 colors with multiple blue variations.
Key Specifications:
- 9-ingredient safe formula
- Cruelty-free and Leaping Bunny certified
- 0.5 oz bottles (larger than most competitors)
- Compatible with any UV/LED lamp
Price Range: $8 for single bottles, $20-60 for sets
The Beetles blue polish selection includes everything from jelly translucent blues to metallic cat-eye effects. Their Fall 2025 collection features stunning blue shades that complement autumn wardrobes perfectly. The formula is highly pigmented, meaning you often achieve full coverage in just two thin coats. Currently, Beetles is running exclusive Amazon Prime deals with up to 50% off select sets.
Customer Feedback: With over 50,000 positive reviews, users love the “salon-worthy results” and the fact that colors stay true without fading. The only consistent critique involves HEMA content, which some users with sensitivities should note.
✅ Pros:
- Incredibly affordable pricing
- Massive color selection
- Larger bottle sizes
❌ Cons:
- Contains HEMA (potential allergen for some)
- Requires base and top coat purchased separately
4. OPI GelColor Baggy Jean Baby – Best Professional Choice
When it comes to professional-grade gel nail polish, OPI GelColor remains the gold standard. Their “Baggy Jean Baby” shade from the Fall 2025 “What’s Your Mani-tude?” collection is a sophisticated cool blue-gray crème that’s been flying off shelves.
Key Specifications:
- Intelli-Gel Technology for self-correcting application
- Professional salon formula
- 0.5 fl oz bottle
- UV cure gel technology
Price Range: $12-15 per bottle
OPI’s blue gel nail polish delivers up to 3 weeks of chip-resistant, high-shine wear. The Intelli-Gel Technology means the polish self-corrects with every brush stroke, making application foolproof even for home users. The color stays vibrant without dulling, and the formula doesn’t cause nail damage when removed properly. While pricier than drugstore brands, the professional performance and color accuracy justify the investment.
Customer Feedback: Salon professionals and home users alike rave about OPI’s consistency. “This is the only brand where the bottle color exactly matches what ends up on my nails,” one long-time user shared.
✅ Pros:
- Professional salon quality
- Self-correcting formula
- Extensive shade range with precise color matching
❌ Cons:
- Higher price point per bottle
- Professional use designation may intimidate beginners

5. CND Shellac Azure Wish – Best Classic Blue
CND Shellac practically invented the gel polish category, and their Azure Wish shade is a timeless sky blue that works year-round. This is the gel polish that started it all, and it continues to set the standard for quality and durability.
Key Specifications:
- Patent-pending UV3 Technology
- 14+ days of flawless wear
- 0.25 fl oz bottle
- Curve-hugging brush design
Price Range: $7-10 per bottle
CND Shellac’s blue gel polish formula features zero drying time once cured and removes in minutes without damaging nails. The Azure Wish shade is a beautiful medium blue that flatters all skin tones and works for both casual and professional settings. The formula is thin and flexible, creating a natural look that doesn’t feel heavy or thick on the nail. Over 150 shades are available in the Shellac line, giving you endless blue polish gel options.
Customer Feedback: With 15+ years of market presence, CND has loyal customers who refuse to switch brands. “My manicurist uses exclusively CND because nothing else performs as consistently,” one reviewer noted.
✅ Pros:
- Trusted brand with proven track record
- Natural-looking finish
- Quick and easy removal
❌ Cons:
- Smaller bottle size
- Requires CND-specific base and top coats for best results
6. MelodySusie Persian Blue Gel Polish – Best Bold Color
For those who want to make a statement, MelodySusie Persian Blue delivers rich, saturated color that commands attention. This 15ml (0.5 oz) TPO-free thick gel polish is EU-compliant and perfect for creating eye-catching nail art.
Key Specifications:
- TPO-free thick gel formula
- 15ml large capacity bottle
- Natural resin ingredients
- Low odor, non-toxic
Price Range: $8-12 per bottle
This blue nail gel polish stands out for its incredible pigmentation and smooth application. The ergonomic brush covers colors evenly in 2-3 coats, and the thick formula means less running and more control during application. With proper application including base and top coat, this polish lasts 21+ days. The Persian Blue shade is a deep, rich blue with subtle purple undertones that looks stunning in both natural and artificial light.
Customer Feedback: Users appreciate the environmentally conscious formula and the professional salon-level results achievable at home. “This is my go-to for special occasions when I want nails that pop,” one enthusiastic reviewer shared.
✅ Pros:
- Thick, easy-to-control formula
- EU-compliant safety standards
- Rich, highly pigmented color
❌ Cons:
- Limited to online purchase
- Fewer blue shade options compared to major brands
7. Born Pretty Blue Gel Polish Sets – Best for Color Exploration
Born Pretty nail polish sets are beloved by color enthusiasts who want variety without breaking the bank. Their sets typically include 6+ shades ranging from soft pastels to glittery purples and blues, all with smooth application and quick curing times.
Key Specifications:
- 0.26-0.34 fl oz per bottle
- Quick 60-90 second cure time
- Smooth, non-clumpy formula
- Bottles larger than most competitors
Price Range: $20-25 per set
Born Pretty’s gel polish blue selections include both classic shades and trendy variations. The formula is slightly thicker than GELLEN but thinner than traditional gel, striking a nice balance for easy application. Colors are vivid and true-to-bottle, with photos matching reality remarkably well. Sets often include complementary shades that work beautifully together for nail art and ombre designs.
Customer Feedback: Amazon shoppers consistently rate these sets 4.5+ stars, praising the “great value for price” and noting that application is easy even for beginners. Some users mention that while quality is excellent, cure times may vary slightly depending on your lamp wattage.
✅ Pros:
- Excellent value for multiple colors
- Larger bottles than budget competitors
- Vivid, accurate color representation
❌ Cons:
- Slightly higher price than single-brand sets
- Limited individual shade availability
✨ Don’t Miss These Exclusive Deals! 🛍️
Ready to elevate your manicure game with these carefully selected blue gel nail polish options? Click on any highlighted product to check current pricing and availability on Amazon. These professional-grade polishes will help you create stunning, long-lasting manicures right at home! 💙
What Is Blue Gel Nail Polish? Understanding the Basics
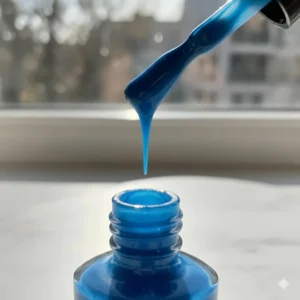
Blue gel nail polish is a specialized nail coating that combines color pigments with a gel-based formula designed to cure (harden) under UV or LED light. Unlike traditional nail lacquer that dries through air exposure, gel polish contains photoinitiators that react to specific light wavelengths, creating a durable, chip-resistant finish that can last 2-4 weeks.
The “gel” in gel nail polish refers to the polymer-based formula that remains fluid until exposed to UV or LED light. When cured, the polish transforms into a hard, glossy coating that’s resistant to chips, scratches, and everyday wear. Blue gel polish specifically refers to any gel formula containing blue pigments, ranging from the palest sky blue to the deepest midnight navy.
What makes blue gel nail polish particularly appealing is how the gel formula enhances color vibrancy. Blue pigments can sometimes appear dull in traditional lacquers, but the gel base creates depth and dimension that makes blues pop beautifully. The high-gloss finish of cured gel also creates a “wet look” that traditional polish simply can’t match, making even subtle blue shades appear more sophisticated and salon-professional.
Modern gel nail polish blue formulations have evolved significantly from early versions. Today’s products often feature 9-free, 11-free, or even 15-free formulations, meaning they exclude harmful chemicals like formaldehyde, toluene, and DBP. Many brands now offer vegan, cruelty-free options that prioritize nail health while delivering stunning color payoff. This makes blue gel polish not just a cosmetic choice, but a healthier alternative to traditional nail products.
How to Choose the Perfect Blue Gel Nail Polish Shade 🎨
Selecting the ideal blue shade involves more than just picking your favorite color – it’s about understanding undertones, occasions, and how different blues interact with your skin tone.
Consider Your Skin Tone
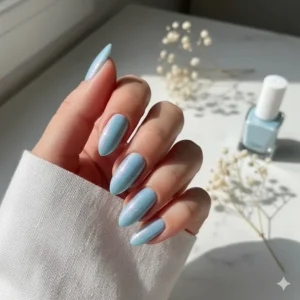
For fair skin tones, cooler blues like baby blue, powder blue, and periwinkle create a fresh, delicate look. These shades provide beautiful contrast without overwhelming paler complexions. Sky blue gel polish works particularly well for everyday wear.
Medium skin tones have the most versatility and can pull off nearly any blue gel nail polish shade. Try experimenting with teal, turquoise, and royal blue for vibrant looks, or opt for dusty blue and slate for more subdued elegance.
Deeper skin tones look absolutely stunning in rich, saturated blues. Navy blue gel polish, cobalt, and electric blue create gorgeous contrast and make a bold statement. Metallic and shimmer blue formulas also look particularly striking on darker skin.
Match Your Lifestyle
Your daily activities should influence your blue polish gel selection. If you work in a conservative office environment, stick with subtle shades like dove blue, blue-gray, or muted slate. These professional tones won’t distract while still adding personality to your appearance.
For creative fields or casual workplaces, feel free to explore brighter options. Cerulean, bright turquoise, and ocean blue bring energy and creativity to your look. Weekend warriors can really go wild with neon blues, glitter formulations, and artistic nail designs.
Seasonal Considerations
Spring and summer call for lighter, airier blues – think baby blue, aqua, and seafoam. These fresh shades complement warm weather wardrobes and summer activities beautifully. Jelly blue gel polish formulas are particularly trendy for these seasons.
Fall and winter welcome deeper, richer tones. Navy gel polish, midnight blue, and blue-black shades pair perfectly with cozy sweaters and holiday parties. Metallics and shimmer blue polishes also shine during these festive seasons.
Finish Selection
The finish dramatically impacts how your blue gel nail polish appears. Glossy finishes are classic and versatile, working for any occasion. They maximize color vibrancy and create that coveted “just left the salon” shine.
Matte blue gel polish offers a modern, sophisticated alternative. These finishes work particularly well for deeper blues and create an edgy, fashion-forward aesthetic. Some brands offer both glossy and matte top coats, letting you switch up the look without changing your base color.
Shimmer and metallic finishes add dimension and visual interest. Blue glitter gel polish catches light beautifully and works great for special occasions. Cat-eye blue gel creates mesmerizing 3D effects that shift as you move your hands.
Essential Tools and Supplies for Blue Gel Polish Application 🔧
Before diving into application, let’s ensure you have everything needed for salon-quality results at home. Proper tools make all the difference between a manicure that lasts three days and one that goes the full month.
Must-Have Equipment
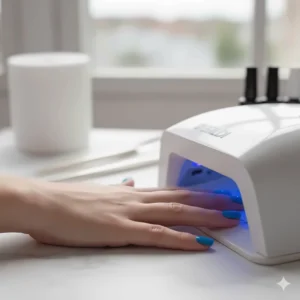
Your UV or LED lamp is the foundation of successful gel application. LED lamps cure faster (30-60 seconds) and last longer than UV lamps, but both work effectively. Look for lamps with at least 36 watts of power; 48-72 watt lamps are even better and cure more evenly. Many quality lamps now feature automatic sensors that turn on when you insert your hand.
Quality brushes matter more than most people realize. If your gel polish doesn’t come with a good applicator brush, invest in separate brushes. A flat, wide brush works best for full nail coverage, while thin detail brushes help with nail art and cleanup. Some people prefer the precision of working with separate brushes rather than relying solely on the bottle applicator.
A good cuticle pusher and nail file are non-negotiable. Push back cuticles gently before application – gel won’t adhere properly to skin. Use a 180-grit nail file to shape nails and a buffer (220-280 grit) to very lightly roughen the nail surface, which helps gel adhere better and last longer.
Critical Gel Polish Components
Never skip the base coat – it’s not optional. Base coat protects your natural nails from staining and provides a crucial bonding layer for the colored gel polish to grip. Apply a thin, even layer and cure it completely before moving to color.
Your blue gel nail polish is obviously the star, but application technique matters. Always apply thin coats rather than one thick coat. Two or three thin layers cure more evenly, last longer, and look more professional than one goopy application.
Top coat seals everything and provides that gorgeous shine. No-wipe top coats are convenient as they eliminate the sticky layer that forms after curing. If you use a regular top coat, you’ll need isopropyl alcohol (91% or higher) and lint-free wipes to remove the tacky residue after curing.
Additional Helpful Supplies
Nail prep solutions or dehydrators remove natural oils and moisture from the nail surface, improving gel adhesion. A simple rubbing alcohol wipe works, but dedicated nail prep products perform better.
Cuticle oil is essential for maintaining healthy nails during gel wear. Apply it daily around cuticles and under nail tips to prevent dryness and lifting. Don’t apply before gel application, though – it’ll prevent proper adhesion.
Cotton pads, acetone, and aluminum foil are necessary for removal. You’ll also want a clean-up brush dipped in acetone for fixing mistakes during application. Keep a small container of acetone nearby for quick corrections before curing.
Step-by-Step Application Guide for Perfect Blue Gel Nails 💅
Achieving salon-quality results at home is absolutely possible with the right technique. I’ve refined this process over years of trial and error, and these steps will help you avoid the common pitfalls that lead to chipping and peeling.
Preparation Phase
Start with clean, dry nails. Remove any existing polish completely using acetone. Wash hands thoroughly with soap to remove acetone residue and any oils. Your nails should be completely dry before proceeding – even small amounts of moisture can cause gel to lift.
Push back cuticles gently using your cuticle pusher. Don’t cut cuticles unless absolutely necessary; pushing them back is safer and sufficient. Remove any excess dead skin around the nail plate carefully.
File and shape your nails to your desired length and shape. File in one direction rather than sawing back and forth to prevent splitting. Lightly buff the nail surface with a fine-grit buffer – you want to create a slightly rough texture without damaging the nail. This mechanical bonding surface helps gel adhere better.
Wipe nails with rubbing alcohol or nail prep solution using a lint-free wipe. This removes invisible oils and dust from buffing. Let nails air dry completely for about 30 seconds before moving to the next step.
Application Process
Apply a thin layer of base coat to all five nails on one hand. Start in the middle of the nail, then cover sides. Cap the free edge by running the brush across the nail tip – this prevents chipping. Avoid getting product on your skin or cuticles. Cure in your UV/LED lamp according to manufacturer instructions (typically 30-60 seconds).
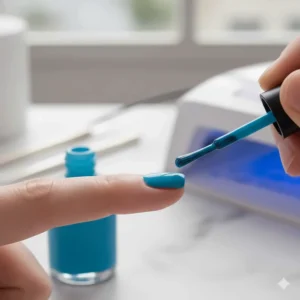
Once the base coat is cured, it’s time for your blue gel nail polish. Shake the bottle gently to mix the pigment evenly. Apply your first thin coat of color. Start slightly away from the cuticle (leave a tiny gap), then gently push the brush toward the cuticle before pulling it down toward the nail tip. This technique prevents product from touching skin.
Paint the center of the nail first, then each side in smooth strokes. Don’t forget to cap the free edge. Cure this first coat completely. The nail will still look slightly streaky or sheer – that’s normal.
Apply a second thin coat of blue gel nail polish using the same technique. This coat will provide full opacity and rich color. For very light or very dark blues, you might need a third coat, but always keep coats thin. Cure each layer completely before moving on.
Finishing Touches
Apply your top coat in the same manner as previous layers – center first, then sides, always capping the free edge. Top coat should be slightly thicker than color coats but not so thick it causes flooding. Cure for the full recommended time (often 60 seconds for top coats).
If using a traditional top coat (not no-wipe), you’ll see a sticky residue after curing. This is normal – it’s called the inhibition layer. Remove it using a lint-free wipe saturated with 91% isopropyl alcohol or higher. Wipe each nail thoroughly to reveal the beautiful shine beneath.
Apply cuticle oil around nails and gently massage in. This adds moisture and makes nails look professionally finished. Your manicure is now complete and ready for immediate use – no waiting for nails to dry!
Pro Tips for Longevity
Clean your nail tips daily. The free edge collects dirt and can harbor moisture that causes lifting. Use a soft nail brush with soap and water, being gentle around the gel edges.
Apply cuticle oil daily, especially before bed. This prevents the gel from becoming brittle and reduces the chance of lifting around cuticles where natural oils accumulate.
Wear gloves for household chores, especially when using water or chemicals. Prolonged water exposure and harsh chemicals are the biggest enemies of long-lasting gel polish. Even “tough” gel can break down with constant exposure.
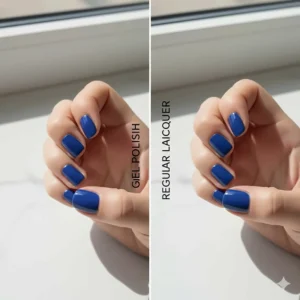
Blue Gel Polish vs Traditional Nail Polish: Key Differences
Understanding the fundamental differences between gel and traditional polish helps you make informed decisions about which product suits your lifestyle best.
| Feature | Blue Gel Nail Polish | Traditional Blue Polish |
|---|---|---|
| Drying Time | Instant (with lamp) | 10-30 minutes |
| Durability | 14-28+ days | 3-7 days |
| Shine Level | High gloss, long-lasting | Good initially, dulls quickly |
| Removal | Requires soaking in acetone | Wipes off with regular remover |
| Application | Multi-step with curing | Single application |
| Price | $8-15 per bottle + lamp | $3-10 per bottle |
| Nail Damage | Minimal if removed properly | Generally none |
| Color Vibrancy | Extremely vibrant throughout wear | Fades over time |
The most significant difference lies in the chemical composition. Traditional polish relies on solvents that evaporate to leave behind a solid film. This is why it needs drying time and why it remains relatively brittle. Gel polish uses photoinitiators that create cross-linking polymer chains when exposed to UV/LED light, forming a more durable structure.
Cost-wise, gel polish blue requires initial investment in a curing lamp ($20-60 for quality LED lamps), but then individual bottles last much longer since you’re not reapplying weekly. Traditional polish seems cheaper upfront but requires frequent repurchase if you maintain color consistently.
The blue nail gel polish finish is noticeably different in person. Gel creates a “wet look” with dimensional shine that catches light beautifully. Traditional polish, even with top coat, has a flatter appearance. For blue shades particularly, gel enhances the richness and depth of the color in ways traditional formula can’t match.
Removal is where gel polish shows its main drawback. While traditional polish wipes off easily, gel requires soaking nails wrapped in acetone-soaked cotton and foil for 10-15 minutes. However, this inconvenience is offset by going 3-4 weeks between manicures instead of touching up every few days.
Common Mistakes to Avoid with Blue Gel Nail Polish ⚠️
Even experienced gel users make these errors. Learning from them will save you frustration and wasted product.
Over-Application
The biggest mistake I see is applying gel polish too thickly. Thick layers don’t cure properly, staying gooey underneath while appearing set on top. This leads to smudging, denting, and premature lifting. Always apply thin, even coats – it’s better to do three thin layers than two thick ones. Each layer should be almost translucent before curing.
Incomplete Curing
Not all lamps are created equal, and older bulbs lose effectiveness. If your gel polish is denting, smudging, or peeling quickly, inadequate curing is often the culprit. Ensure your lamp has sufficient wattage (minimum 36W for LED, 48W+ is better). Replace bulb strips or the entire lamp according to manufacturer recommendations. When in doubt, add 10-15 seconds to cure times.
Skipping the Cap
“Capping” means running your brush along the free edge of the nail after applying polish. This seals the tip and prevents chipping. Every single layer – base coat, color coats, and top coat – should cap the edge. This simple step extends wear time dramatically. Missing it on even one layer compromises your entire manicure.
Neglecting Preparation
Rushing through prep is a recipe for disaster with gel polish. Skipping cuticle pushing means gel adheres to skin, leading to lifting. Failing to remove all oils prevents proper bonding. Not buffing the nail plate (even gently) reduces mechanical adhesion. The five minutes spent on thorough prep prevents days of frustration dealing with premature lifting.
Improper Removal
Peeling or picking off gel polish is incredibly damaging to natural nails. This removes layers of your nail plate along with the gel, leaving nails thin, weak, and prone to tearing. Always soak gel off properly using acetone and patience. Your future nails will thank you for the extra 15 minutes of removal time.
Flooding the Cuticles
Getting blue gel nail polish on skin or cuticles is more than just messy – it creates lifting points. Gel adheres to skin similarly to nails, but skin cells shed constantly, taking gel with them. This creates gaps where moisture enters, undermining the entire manicure. Leave a tiny gap near cuticles during application, or clean up mistakes immediately with an acetone-dipped brush before curing.
Maintaining Your Blue Gel Manicure for Maximum Longevity 🛡️
A stunning manicure is just the beginning – proper maintenance keeps it looking fresh for the full 3-4 weeks.
Daily Care Routine
Morning moisture is essential. Apply cuticle oil to all nails each morning, massaging it into the cuticle area and nail plate. This prevents the gel from becoming brittle and reduces lifting around edges where natural oils accumulate. Cuticle oil also maintains flexibility in your natural nails underneath the gel.
Hand washing requires attention to detail. While thoroughly cleaning hands, be extra gentle around nail tips. The free edge is the most vulnerable area for catching and lifting. After washing, dry hands completely, paying special attention to areas under nails where moisture can accumulate.
Before bed, reapply cuticle oil. This nighttime application is particularly important because your hands regenerate and repair during sleep. Well-moisturized nails and cuticles are less likely to develop the micro-lifts that turn into major problems.
Weekly Maintenance
Examine your nails carefully once a week for any signs of lifting. Catching minor lifting early prevents water and bacteria from getting underneath the gel polish blue coating. If you notice any edges starting to lift, carefully trim them with cuticle nippers or file them smooth.
Gently buff the surface of your gel nails with a very fine buffer. This removes any minor scratches or dullness that can accumulate over time. Don’t over-buff – just a few gentle passes restore shine. Some people prefer to apply a thin layer of regular top coat over gel for extra protection and shine renewal.
Clean under the free edge thoroughly using a soft nail brush and soap. This area attracts dirt and can harbor moisture that undermines gel adhesion. Keep it clean and dry for best longevity.
Protective Measures
Gloves are your gel manicure’s best friend. Wear them for dish washing, cleaning, gardening, and any activity involving prolonged water exposure or harsh chemicals. Chlorine in pools and hot tubs is particularly damaging to blue gel polish, breaking down the formula and causing premature lifting and dulling.
Avoid using your nails as tools. Opening cans, scratching off stickers, or prying things apart puts stress on the gel and your natural nails. These actions cause flex that can break the gel seal, leading to chipping and lifting.
Be mindful during activities like typing or playing instruments. While gel nails are durable, repeated impact on the same areas can cause micro-fractures in the gel that eventually lead to chips. Consider the thickness of your gel application if you engage in these activities frequently.
Touch-Up Techniques
For minor tip wear, you can extend your manicure with careful top coat refreshing. Clean the nail thoroughly with alcohol, then apply a thin layer of matching top coat. Cure it properly, and you’ve bought yourself another week of wear.
If a single nail chips significantly, you can do a repair without redoing your entire manicure. Gently file the damaged area smooth, clean with alcohol, apply base coat, cure, then apply your blue gel nail polish, cure, and finish with top coat. This spot-fix blends surprisingly well and saves time.
Health and Safety Considerations for Gel Polish 💊
While gel polish is generally safe, understanding proper usage and precautions ensures healthy nails long-term.
Choosing Safe Formulations
Modern gel polishes have evolved significantly regarding safety. Look for products labeled as 9-free, 11-free, or 15-free. These numbers indicate how many potentially harmful chemicals are excluded from the formula. Common exclusions include formaldehyde, toluene, DBP, formaldehyde resin, camphor, ethyl tosylamide, xylene, parabens, and fragrances.
HEMA (2-hydroxyethyl methacrylate) is a common gel polish ingredient that can cause allergic reactions in sensitive individuals. If you develop itching, redness, or swelling around nails, you may have developed a HEMA allergy. Switch to HEMA-free formulas, which are increasingly available. Brands like GELLEN and some CND Shellac formulas now offer HEMA-free options.
TPO (triphenyl phosphate) is another ingredient some people avoid. It’s used as a plasticizer but concerns about its potential as an endocrine disruptor have led some manufacturers to create TPO-free formulations. EU regulations require TPO-free formulas, making European brands a good choice if this concerns you.
Proper Removal Techniques
Never peel or pick gel polish off your nails. This warning bears repeating because it’s the single most damaging thing you can do to your natural nails. Peeling removes layers of your nail plate, leaving nails thin, weak, and damaged for months as they slowly grow out.
The proper removal method involves soaking. Saturate cotton pads with pure acetone (not nail polish remover – you need 100% acetone), place them on each nail, and wrap with aluminum foil. Wait 10-15 minutes, then gently push off the softened gel with a wooden cuticle pusher. If gel doesn’t remove easily, re-wrap and wait longer rather than forcing it.
Some people use the “peel-off base coat” method, where a special base coat allows gel to be peeled away without damaging nails. While gentler than peeling regular gel, this method still shouldn’t be used constantly. Occasional use is fine, but regular soaking removal is safest for long-term nail health.
Preventing Over-Processing
Taking occasional breaks from gel polish allows your natural nails to recover. After 2-3 months of continuous gel wear, consider going bare for a week or two. During this time, use strengthening treatments and cuticle oil liberally to restore moisture and flexibility to your nails.
Watch for signs of over-processing: thin, bendy nails; white spots or lines; persistent yellowing; or pain at the nail bed. These indicate your nails need a break from gel. Switch to traditional polish for a few weeks, or go completely bare while focusing on nail care.
Maintain nail health during gel wear by keeping nails at moderate length. Very long gel nails experience more stress and flex, potentially damaging the nail plate underneath. Find a length that feels comfortable and doesn’t interfere with daily activities.
UV Exposure Concerns
UV lamps used for curing emit UVA rays, which raise concerns about skin damage. While exposure time is brief (30-90 seconds per hand), cumulative exposure over years could theoretically increase skin cancer risk. The actual risk appears very low based on current research, but taking precautions makes sense.
Apply broad-spectrum SPF 30+ sunscreen to hands 20 minutes before your manicure. This protects skin during curing. Alternatively, wear fingerless UV-protective gloves during curing – these block UV rays while leaving nails exposed for curing.
LED lamps emit different wavelengths than UV lamps and are considered safer. If UV exposure concerns you, choose an LED lamp for home use. LED lamps also cure faster and last longer, making them a better investment overall.
Creative Blue Gel Nail Polish Ideas and Designs 🎨
Once you’ve mastered basic application, the real fun begins with creative designs that showcase your blue gel polish beautifully.
Classic Blue Variations
The simple solid blue manicure never goes out of style, but varying the shade from finger to finger creates interesting dimension. Try a monochromatic gradient – paint your thumb the darkest navy, then progress through royal blue, sky blue, baby blue, and ice blue on your pinky. This ombre hand looks sophisticated yet creative.
Accent nails add interest without overwhelming. Paint four nails in a neutral nude or soft pink, then make your ring fingers pop with vibrant blue gel polish. This draws attention to your hands without being too bold for conservative environments. Swap which finger gets the accent to change up the look.
French tips with a twist modernize the classic manicure. Instead of white tips, use blue gel nail polish for a fresh take. Baby blue creates a soft, romantic look; navy offers sophistication; electric blue makes a bold statement. Keep the smile line clean and precise for maximum impact.
Artistic Techniques
Marble effects create stunning, one-of-a-kind nails. Apply a base coat of white or light gray gel, cure it, then drop small amounts of blue gel polish onto the uncured surface. Use a thin brush or toothpick to swirl colors together, creating marble veining. Cure, then apply top coat. Each nail will be unique, like real marble.
Gradient or ombre nails transition smoothly from one color to another. Start with your darkest blue at the cuticle, then use a makeup sponge to dab on progressively lighter shades toward the tip. Blend where colors meet, then cure. This technique requires practice but creates beautiful results once mastered.
Geometric designs work especially well with blue gel polish. Use striping tape to create clean lines, then paint sections in different blue shades or pair blues with complementary colors like gold or silver. Remove the tape before curing for crisp edges.
Seasonal and Themed Designs
Summer calls for beachy vibes. Pair light blue gel polish with white and gold accents to evoke ocean waves and sunshine. Add tiny shell or starfish decals for extra beach flair. Jelly blue formulas look particularly appropriate for summer.
Winter transforms blues into icy elegance. Pair navy or midnight blue with silver glitter for a frosty effect. Add snowflake decals or paint delicate white designs over blue bases. Deep blues with holographic top coats create a frozen, crystalline effect perfect for the season.
Holiday themes work beautifully with blue. Hanukkah-inspired nails pair blue and silver with Star of David accents. Winter holiday designs might feature navy blue with gold snowflakes. Fourth of July nails alternate blue with red and white in patriotic patterns.
Advanced Nail Art
Cat-eye gel creates mesmerizing 3D effects in blue shades. These specialized magnetic gels contain metallic particles that align when you hold a magnet over wet gel. The effect shifts and shimmers as you move your hands, creating depth and dimension that photographs beautifully.
Chrome effects over blue create futuristic, mirror-like finishes. Apply blue gel polish as your base, cure it, then rub chrome powder over a tacky top coat. The result is a stunning metallic sheen in blue tones that catches every ray of light.
Nail stamping allows intricate designs without artistic skill. Choose stamps with patterns you love, apply them over blue gel polish bases, then cure and top coat. This technique opens endless design possibilities even for those without steady hands for freehand painting.
Troubleshooting Common Blue Gel Polish Problems 🔧
Even with perfect technique, issues sometimes arise. Here’s how to fix the most common problems.
Peeling and Lifting
If your blue gel nail polish is lifting from the free edge or sidewalls, examine your prep and application technique. Did you cap the edge with every layer? Did you buff the nail plate and remove all oils before application? Did you avoid flooding cuticles? Address these fundamentals first.
Temperature and humidity affect gel curing and adhesion. Applying gel in very cold conditions can cause improper curing. Very high humidity can introduce moisture between layers. Aim for comfortable room temperature (65-75°F) and moderate humidity when doing gel manicures.
Nail flexibility causes problems for some people. If you have very thin, flexible nails, they bend during daily activities, creating stress points where gel lifts. Consider keeping nails shorter, using ridge-filling base coats, or trying gel systems specifically designed for thin nails.
Wrinkling and Bubbling
Bubbles in cured gel usually stem from shaking the bottle too vigorously before use. Gel polish should be gently rolled between palms to mix, not shaken like regular polish. Shaking introduces air bubbles that become trapped in the cured gel.
Wrinkling often indicates undercured gel. If the surface cures before deeper layers, the underlying gel continues reacting and contracting, causing surface wrinkles. Ensure your lamp has sufficient wattage and cure for the full recommended time. Replace lamp bulbs if they’re old.
Application over uncured layers causes problems too. If you don’t fully cure one layer before adding the next, chemical reactions between layers can cause wrinkling, bubbling, or poor adhesion. Always cure each layer completely before proceeding.
Chipping and Cracking
Chips at the free edge almost always result from failing to cap the edge with every layer. This is the most vulnerable area and needs protection. Always run your brush across the tip after painting each layer – base coat, color coats, and top coat.
Cracking through the nail surface suggests the gel is too thick or brittle. Gel needs some flexibility to move with your natural nail. Very thick applications crack under normal stress. Apply thinner coats, or switch to a more flexible gel formula if cracking persists.
Impact damage happens to everyone occasionally. If you chip a nail, resist the urge to pick at it. File the chip smooth, clean the area with alcohol, and do a spot repair by applying base coat, color, and top coat to just that area. Cure each layer and blend carefully.
Color Issues
Streaky application usually means you’re not applying thin enough coats or you need an additional coat. Some blue gel polish shades, particularly very light or very dark blues, naturally require 3-4 thin coats for full opacity. Be patient and build color gradually.
Color appearing different than expected might be a curing issue. Undercured gel can look darker or more translucent. Ensure complete curing. Also, check your polish in different lighting – blues can shift dramatically between natural daylight, fluorescent lighting, and incandescent bulbs.
Yellowing occurs when gel is exposed to UV light without proper top coat protection. Always use top coat with UV inhibitors, especially over lighter blue shades. Yellowing can also result from applying gel over stained nails – always start with clean, unstained nail plates.
Best Practices for Storing Blue Gel Polish 📦
Proper storage extends the life of your gel polish and maintains color consistency.
Storage Conditions
Store gel polish blue bottles in cool, dark places. Light exposure can begin the curing process even through colored bottles, gradually thickening the polish. A drawer or cabinet away from windows is ideal. Avoid storing near heat sources like radiators or in direct sunlight.
Temperature stability matters. Extreme temperature fluctuations cause gel formulas to separate or thicken prematurely. Room temperature (65-75°F) is perfect. Don’t store gel polish in unheated garages or attics where temperatures vary dramatically.
Orientation affects longevity. Store bottles upright rather than on their sides. This prevents gel from sitting against the cap seal, which can cause leaking or dried product around threads. Upright storage also helps maintain proper consistency by keeping pigments well-mixed.
Bottle Maintenance
Clean bottle necks and threads after each use. Cured gel on threads prevents proper sealing, allowing air to enter and thicken the remaining polish. Wipe the neck with an acetone-dampened cotton swab before closing the bottle.
Cap tightly after every use. Even brief air exposure begins the oxidation process that degrades gel formulas. Ensure caps are screwed on completely, but don’t overtighten – you might crack the bottle or make it difficult to open later.
Check consistency before use. If gel has thickened slightly, you can carefully add 1-2 drops of gel thinner (not regular polish thinner). Roll gently between palms to mix. If gel has become stringy, gummy, or separated, it’s time to replace it.
Shelf Life Awareness
Unopened gel polish blue typically lasts 2-3 years when stored properly. Once opened, aim to use within 12-18 months for best results. Mark bottles with opening dates using a label or permanent marker.
Signs of expired gel include thickening, separation that won’t mix back together, unusual odor, or visible chunks. Expired gel won’t cure properly and can cause application problems. When in doubt, test a small amount on a practice nail before committing to a full manicure.
Organize by age and use older polishes first. A first-in-first-out system ensures you use products while they’re still fresh. Keep frequently used shades at the front and special occasion colors toward the back.
Environmental Impact and Sustainable Gel Polish Choices 🌍
As awareness of environmental issues grows, making conscious choices about gel nail polish matters.
Eco-Friendly Formulations
Vegan and cruelty-free certifications indicate brands that don’t test on animals and don’t use animal-derived ingredients. Many blue gel polish brands now carry Leaping Bunny certification or PETA approval. Beetles Gel Polish and several other popular brands are certified cruelty-free.
Reduced toxin formulas benefit both your health and the environment. 11-free and 15-free polishes eliminate harmful chemicals that pollute water systems during removal and disposal. These formulas perform just as well as traditional gels while reducing environmental impact.
Biodegradable glitter in gel polish represents a growing trend. Traditional glitter is plastic microbeads that never decompose. Eco-conscious brands now use plant-based glitter alternatives that break down naturally without sacrificing sparkle in your blue glitter gel polish.
Packaging Considerations
Glass bottles are more environmentally friendly than plastic. They’re fully recyclable and don’t leach chemicals. Some premium gel brands package their blue nail gel polish in glass, making disposal more sustainable.
Minimal packaging reduces waste. Brands that skip excessive cardboard boxes and plastic wrapping decrease their environmental footprint. Look for companies that use recycled or recyclable packaging materials.
Bottle size affects waste. While small bottles seem cute, larger capacity bottles (15ml instead of 7ml) mean less frequent purchases, less packaging waste, and better value. Consider this when choosing between brands.
Responsible Disposal
Never pour gel polish or acetone down drains. These chemicals harm aquatic life and can damage plumbing. Check with local waste management about hazardous waste disposal programs. Many areas have collection days for household chemicals.
Used cotton pads and acetone should go in sealed plastic bags before trash disposal. This prevents chemicals from leaching into soil or water. Some nail salons accept used supplies for proper disposal – call ahead to ask.
Empty bottles can often be recycled. Remove as much product as possible, rinse with acetone, then dispose according to local recycling guidelines. Glass bottles are almost always recyclable; plastic caps often aren’t.
❓ Frequently Asked Questions About Blue Gel Nail Polish
❓ How long does blue gel nail polish actually last?
❓ Do I really need a UV lamp, or can blue gel polish air dry?
❓ Can blue gel nail polish damage my natural nails?
❓ What's the difference between gel polish and regular nail polish in blue shades?
❓ Which blue gel nail polish shade is most flattering for everyday wear?
Conclusion: Your Journey to Perfect Blue Gel Nails Starts Now 💙
Blue gel nail polish has transformed from a niche product into a mainstream beauty essential, and for good reason. The incredible durability, stunning color payoff, and professional finish make it worth the initial learning curve and investment in supplies. Whether you choose the vibrant variety of Modelones, the beginner-friendly GELLEN kits, the budget-conscious Beetles options, or the professional-grade OPI and CND Shellac formulas, you’re investing in weeks of beautiful, chip-resistant nails.
Remember the key takeaways we’ve covered: proper preparation is essential, thin coats trump thick ones, capping the free edge extends wear dramatically, and patient removal prevents nail damage. With the right products, tools, and techniques, you can achieve salon-quality blue gel manicures at home for a fraction of the cost.
The beauty of blue gel nail polish extends beyond just aesthetics. It’s about the confidence you feel when your nails look polished and professional, the time you save not worrying about chips and touch-ups, and the creative expression that comes from choosing shades and designs that reflect your personality. From subtle dusty blues for the office to electric blues for weekend adventures, there’s a shade for every mood and moment.
Start with one of the recommended products from our top 7 list, follow the application guide carefully, and be patient with yourself as you learn. Your first few manicures might not be perfect, but each one will be better than the last. Before you know it, you’ll be the person everyone asks, “Where did you get your nails done?” – and you’ll smile knowing you did them yourself.
✨ Ready to Transform Your Manicure Game? 💅
Check current prices and availability for all the blue gel nail polish products featured in this guide. Choose the option that fits your skill level, budget, and style preferences. Your perfect blue gel manicure is just a click away!
Recommended for You
- Blue Nail Polish Colors: 7 Stunning Shades That’ll Transform Your Look
- Shades of Pink Nail Polish: 7 Must-Have Colors for 2025
- Strawberry Milk Nail Polish: 7 Best Shades 2025
Disclaimer: This article contains affiliate links. If you purchase products through these links, we may earn a small commission at no additional cost to you.
✨ Found this helpful? Share it with your friends! 💬🤗